Effective film lighting moves beyond simply illuminating a subject; it actively shapes narrative, defines mood, and directs audience attention. For any filmmaker, videographer, or content creator, understanding lighting fundamentals is not merely a technical skill but a foundational storytelling discipline. This guide introduces the core principles and practical applications of film lighting, equipping beginners with the knowledge to make deliberate, impactful lighting choices that elevate their visual work. Understanding these principles transforms lighting from a technical necessity into a foundational storytelling discipline.
Understanding the Fundamentals of Light
Quality of Light: Hard vs. Soft
The quality of light refers to the harshness or softness of the shadows it creates. This distinction is critical because it directly influences the mood and texture of your visuals.
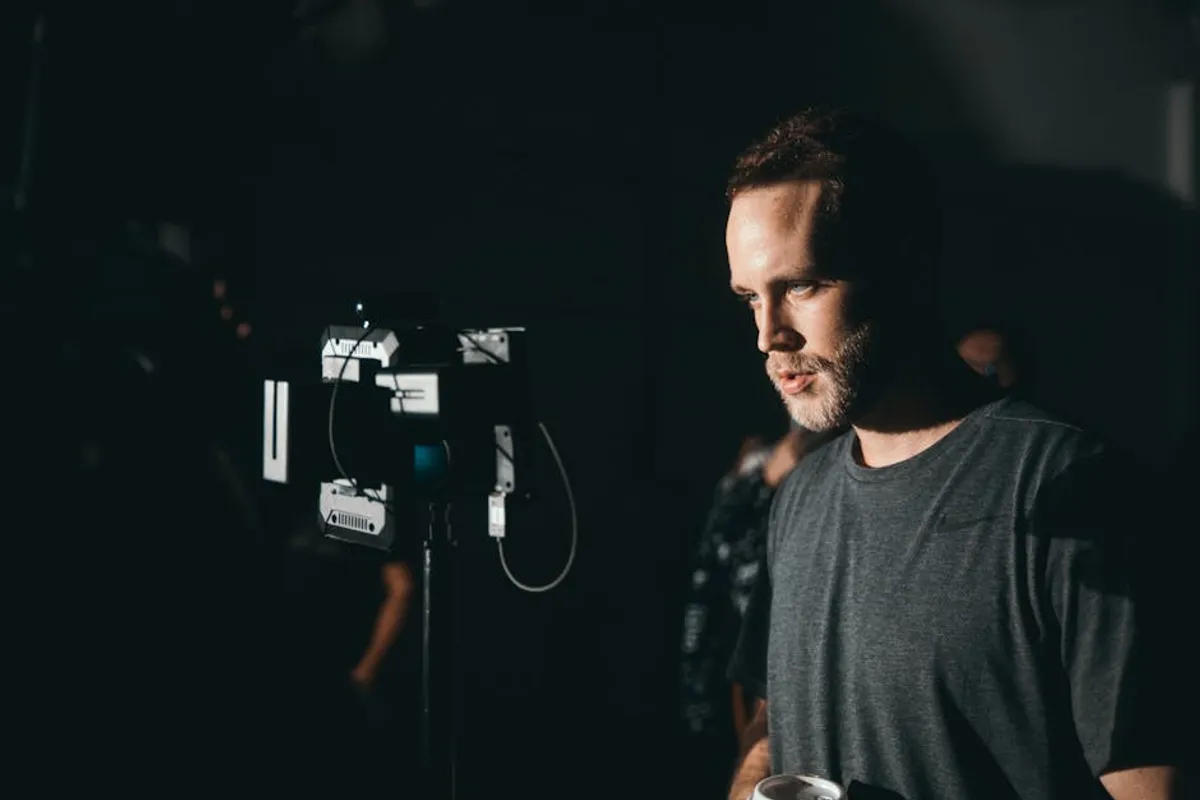
- Hard Light: Characterized by sharp, well-defined shadows and high contrast. Hard light sources are typically small relative to the subject, like a bare bulb or the sun on a clear day. It often conveys drama, intensity, or harsh reality. Think film noir or intense interview setups.
- Soft Light: Produces gradual transitions from light to shadow, with less distinct edges and lower contrast. Soft light sources are large relative to the subject, achieved by diffusing a hard light or using a large light source directly. It generally creates a flattering, gentle, or naturalistic look, suitable for beauty shots, romantic scenes, or general interviews.
The choice between hard and soft light is a creative decision, not a technical default. Consider the emotional impact you want to achieve before selecting your light quality.
Direction of Light: Key, Fill, and Back
The direction from which light strikes your subject profoundly impacts dimensionality, mood, and separation from the background. The most common foundational setup is three-point lighting, which utilizes three distinct light positions:
- Key Light: This is the primary and strongest light source, illuminating the main subject. It typically sits to one side of the camera, angled towards the subject, defining its shape and form. Its placement dictates the overall mood and exposure.
- Fill Light: Positioned on the opposite side of the camera from the key light, the fill light reduces or "fills in" the shadows created by the key light. It is usually softer and less intense than the key light, preventing shadows from becoming too deep or distracting. The ratio between key and fill light determines the contrast of the image.
- Back Light (or Hair Light/Rim Light): Placed behind the subject, often opposite the key light, the back light creates a subtle rim of light around the subject's head and shoulders. This separates the subject from the background, adding depth and dimension to the image. Without a back light, subjects can appear flat or blend into their surroundings.
While three-point lighting is a starting point, many effective setups use fewer lights or modify these positions. The underlying principle is controlling light direction to sculpt your subject.
Color Temperature
Color temperature refers to the color cast of a light source, measured in Kelvin (K). Different light sources emit light with varying color characteristics, from warm, orange tones to cool, blue tones. Matching or intentionally contrasting these temperatures is crucial for achieving a desired aesthetic and maintaining consistent white balance.
- Warm Light (e.g., 2700K-3200K): Incandescent bulbs, sunsets, candlelight. These lights have an orange-yellow hue.
- Daylight (e.g., 5000K-6500K): Overcast sky, electronic flashes, some LED panels. These lights appear neutral to slightly blue.
Understanding color temperature allows you to make deliberate choices: either match your lights to existing ambient light for a natural look or use contrasting temperatures to create visual interest or mood (e.g., warm practicals in a cool, moonlight scene).
Essential Lighting Equipment for Beginners
Light Sources
Beginners have access to efficient, affordable light sources that offer significant control.
- LED Panels: Versatile and energy-efficient, many LED panels offer adjustable brightness and color temperature (bi-color or RGB). They are cool to the touch and portable, making them ideal for small setups.
- COB (Chip-on-Board) Lights: These single-source LEDs offer powerful output in a compact form factor, often with Bowens mount compatibility for a wide range of modifiers. They are excellent for key or back lights where intensity is needed.
- Practicals: These are "in-scene" light sources like lamps, candles, or even phone screens. They add realism and can serve as effective ambient or accent lights, often augmented by dedicated film lights to enhance their output.
Light Modifiers
Modifiers shape and control the light from your source, transforming its quality and direction.
- Softboxes and Umbrellas: These are the primary tools for creating soft light. Softboxes enclose the light source and diffuse it through a front fabric, while umbrellas reflect or shoot through light to spread it out. Both effectively enlarge the light source relative to the subject.
- Diffusers: Translucent materials (like scrims, silks, or even shower curtains) placed between the light source and the subject to soften the light without significantly reducing its intensity.
- Reflectors: Passive tools used to bounce light back onto the subject, typically to fill in shadows. They come in various surfaces (silver for hard reflection, gold for warm reflection, white for soft reflection) and sizes.
Grip Equipment
Properly securing and positioning your lights and modifiers is paramount for safety and precision.
- Light Stands: Essential for holding light fixtures. Look for sturdy stands with a good weight capacity.
- C-Stands (Century Stands): More robust and versatile than basic light stands, C-stands are used for holding flags, scrims, reflectors, and heavier lights. Their unique leg design allows for nesting and precise positioning.
- Clamps and Articulating Arms: Useful for mounting small lights, reflectors, or gobos in unconventional places.
Pro Tip: Always prioritize safety when setting up lighting. Secure all stands with sandbags to prevent tipping, especially when using heavy modifiers or working outdoors. Ensure cables are neatly taped down to prevent tripping hazards, and never exceed the weight capacity of your grip equipment.
Basic Lighting Setups and Techniques
Three-Point Lighting Explained
To implement three-point lighting:
- Key Light Placement: Position the key light 30-45 degrees to one side of the camera and 30-45 degrees above the subject's eye line. This creates a natural-looking shadow on the opposite side of the face.
- Fill Light Placement: Place the fill light on the opposite side of the camera from the key light, slightly lower than the key. Adjust its intensity (or distance) to control shadow depth. A 2:1 ratio (key twice as bright as fill) is a common starting point for balanced lighting.
- Back Light Placement: Position the back light directly behind the subject, aimed at the back of their head and shoulders, ensuring it's out of frame. Adjust its height to create a distinct rim without spilling onto the camera lens.
Experiment with these positions and intensities to understand their impact on your subject's appearance and the overall mood.
Available Light Integration
Available light, such as sunlight or existing room lights, can be a powerful and cost-effective resource. Instead of fighting it, learn to integrate it into your setups. Use large windows as natural key or fill lights, and then augment with artificial lights to control shadows or add accents. Reflectors are particularly effective for redirecting and softening available light.
Practical Lighting Considerations
Beyond creative choices, practicalities like power management and safety are critical. Ensure your power sources can handle the combined wattage of your lights. Use appropriate extension cords and power strips, and be mindful of circuit breakers. Overheating can be a concern with certain light types, so adequate ventilation is important.
Developing Your Lighting Eye
Analyzing Light in Existing Films
One of the most effective ways to improve your lighting skills is to critically observe how light is used in professional productions. Watch films and television shows specifically to analyze the lighting. Ask yourself:
- Where is the key light coming from? Is it hard or soft?
- How are shadows being used? Are they deep and dramatic, or subtle and soft?
- What is the color temperature of the scene? How does it contribute to the mood?
- How are subjects separated from the background?
This analytical approach helps you deconstruct complex lighting setups into their fundamental components, building your visual vocabulary.
Practice and Experimentation
Theory is only the beginning. Consistent practice with your equipment is essential. Start with simple setups using one or two lights and gradually introduce more complexity. Experiment with different light qualities, directions, and modifiers. Document your results, noting what works and what doesn't, and why. There is no single "right" way to light; continuous experimentation will develop your unique style and problem-solving abilities.
Actionable Lighting Steps for Your Next Shoot
Before your next project, consider these steps to apply fundamental lighting principles:
- Define the Mood: Determine the emotional tone you want to convey. Is it suspenseful, joyful, intimate, or stark? This choice will guide your lighting decisions.
- Scout Your Location: Observe existing light sources, both natural and artificial. Identify potential challenges and opportunities for light placement.
- Start Simple: Begin by placing your key light to establish the main illumination. Then, introduce a fill light to control shadows, and finally, a back light for separation.
- Use Modifiers Intentionally: Don't just throw on a softbox. Understand *why* you need soft light for a specific shot and how that modifier achieves it.
- Monitor Your Exposure: Use your camera's light meter and waveform monitors to ensure consistent and correct exposure, especially when balancing multiple light sources.
- Review and Adjust: After shooting a few takes, review your footage. Are the shadows too harsh? Is the subject blending into the background? Make adjustments iteratively.
Frequently Asked Questions About Film Lighting
What is the most important light in a three-point setup?
The key light is generally considered the most important because it provides the primary illumination and defines the subject's form and direction of light. Its placement and intensity set the foundation for the entire lighting scheme.
Can I light a scene effectively with only one light?
Yes, absolutely. Many compelling scenes are lit with a single light source, often combined with reflectors or available ambient light. This approach can create dramatic, high-contrast looks or be softened with diffusion to achieve a naturalistic aesthetic. Mastering single-light setups is a valuable skill for beginners.
How do I avoid harsh shadows without expensive equipment?
To soften shadows without costly gear, use large, white surfaces as natural diffusers or reflectors. A white bedsheet, foam board, or even a large piece of white paper can spread and bounce light effectively. Positioning your subject near a large window also provides soft, natural light.
What is the difference between "lighting for the camera" and "lighting for the eye"?
"Lighting for the eye" refers to how a scene appears to the human eye, which is highly adaptable to varying light levels. "Lighting for the camera," however, involves shaping light specifically for the camera sensor's dynamic range and color rendition. Filmmakers light for the camera to ensure the captured image translates the intended mood and detail, often requiring more deliberate and controlled setups than what might seem "natural" to the naked eye.